Monday 17 December 2012

Teeny, tiny kitchen

Just a little post about a little project. The last project of the year was a relatively small one, in more ways than one. I was given a choice of three photos of a few objects and had to pick one to replicate in 1/8th scale (that's the original size divided by 8 if you were wondering). I picked this photo here:


What with other work and other things getting in the way I was left trying to squeeze a 3 week project into 1. Hard work but I'm pretty pleased with how it turned out. I know it could have looked more realistic and a lot better but I guess it'll do for the time I gave myself.
I won't go into any details on the build as it's all pretty basic stuff but if you're interested you can always ask and I'd be happy to let you know.


The size of the build is ridiculously small and much tinier than I was anticipating. The whole thing could fit in the palm of my hand with room to spare!

Tuesday 4 December 2012

Bedroom/ Forest Bonanza

So my second piece of coursework of my 3rd and final year is finally done and dusted, to say I'm relived is an understatement. I loved working on this project, the building side that is not the write up and flatwork though. I wanted to share with you my final set builds and little character models, though I shan’t bore you with too many details. Here are my final design ideas and a bit further down I'll give you a butchers at my final, finished pieces.


If you recall, though if you don't you can always check my previous post, my brief was to build two completely different sets and a character, posed in different ways, to fit within each set. My idea slightly changed whilst building, though not too much. Instead of my little boy character, that's Rhys to you and me, being fixated with the Shakespeare story of A Midsummer Nights Dream and being within the magical forest I chose to go a different way. Not to be to depressing I decided to have him still in the bedroom reading a book about forests and then to have him in a forest for the other set but I changed the way they were linked slightly. So, Rhys' back story is that he lost his mother and is now living with his grandparents, in his bedroom he has a photograph of himself and his mam in a forest and he loves the thought of being back in that forest as it's where he shared his happiest memories of her.
I'll start with my sets, showing you a few of the steps I took whilst constructing them and then my character models.

Bedroom Set:
Here is the bedroom set in a sort of step by step way. I've only included the key parts of the room, such as the door, bed, window, etc. there are other pieces of furniture but you'll just have to wait to see them.
I made the basic structure of the set from large sheets of relatively thick card, I would have preferred to use wood but I couldn't find any that was large yet thin enough. I then decorated the walls with a cute fox and tree wallpaper, that ties the two sets together nicely yet subtly.


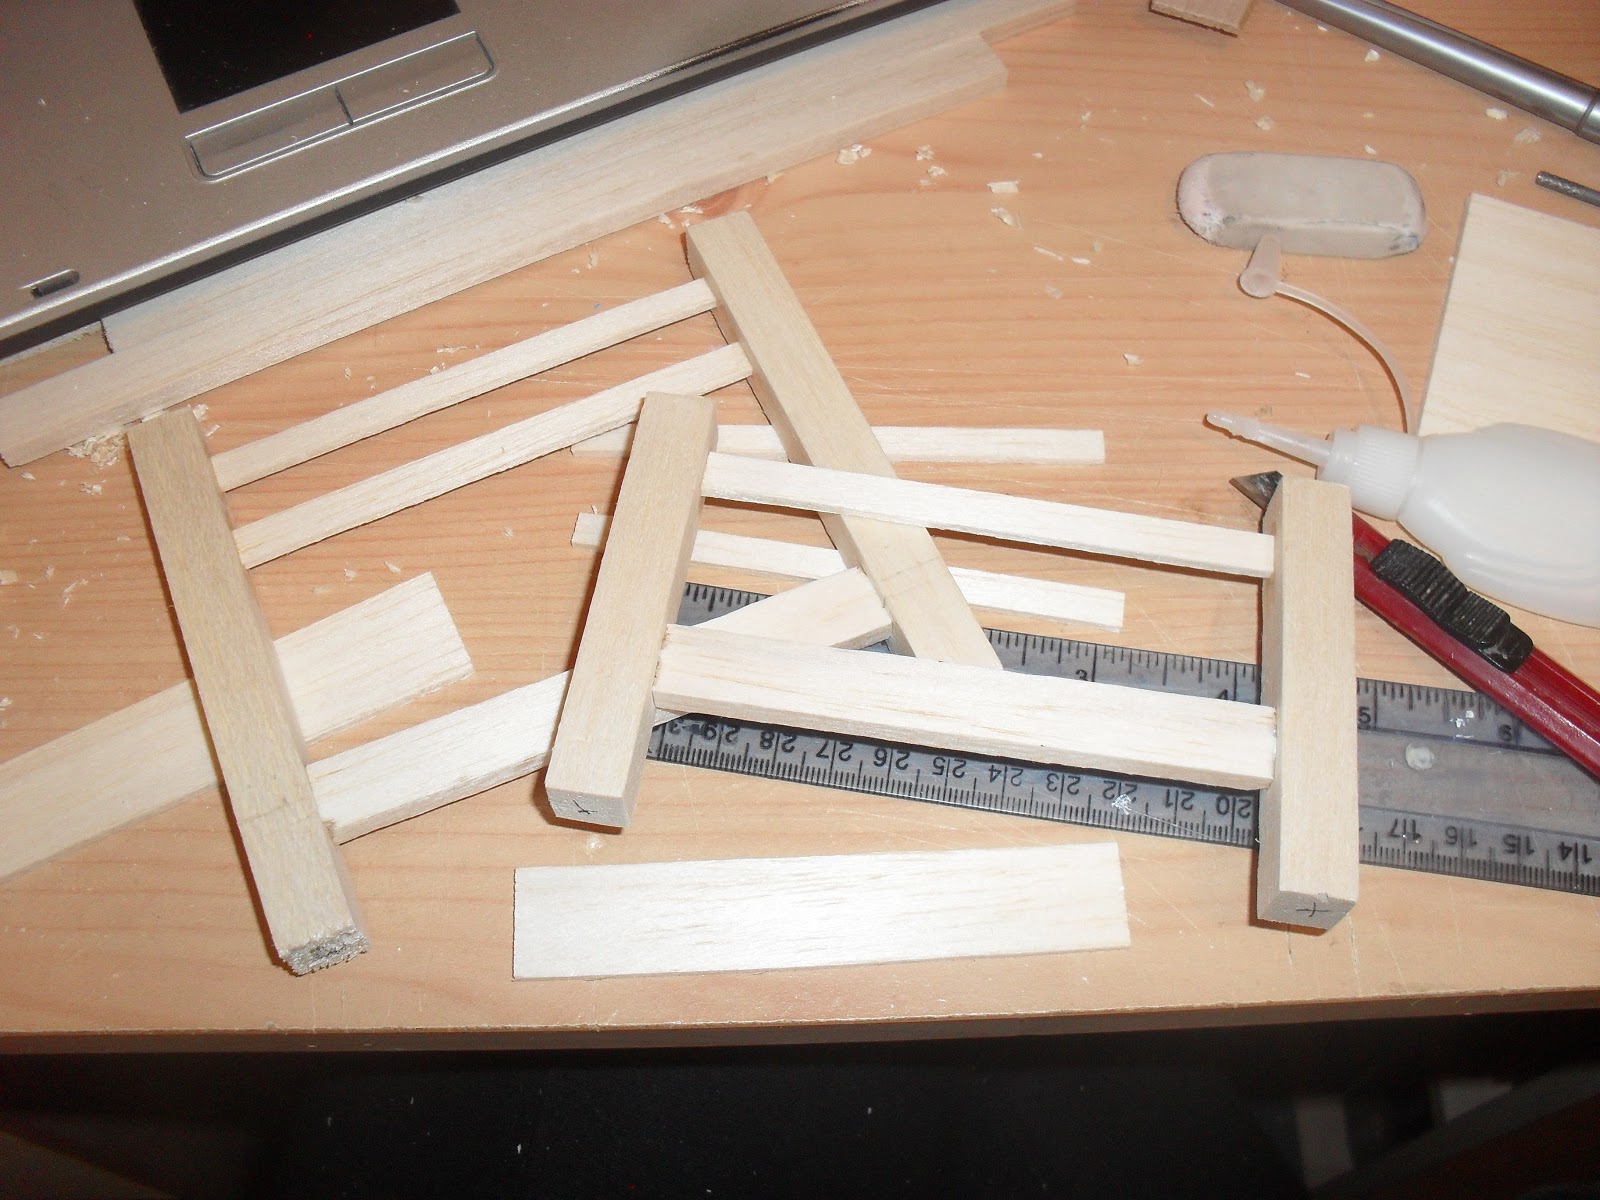
I made both the window and door from pieces of balsa wood that I tried to cut and construct in a way to make them appear more realistic. I even added small sheets of clear plastic to the window to replicate glass.


The bed frame is also made of balsa wood and I even made miniature mortis and tennon joints on it to fix it together. The rest of the bed is made from sponge, for the mattress and pillow, and some fabric for the sheets and pillowcase.


For the floor I constructed it out of hundreds of lolly sticks that I cut to shape and glued into place. It gives a really nice laminate floor effect.


The rest of the bedroom was made in relatively similar ways to these.

Forest Set:
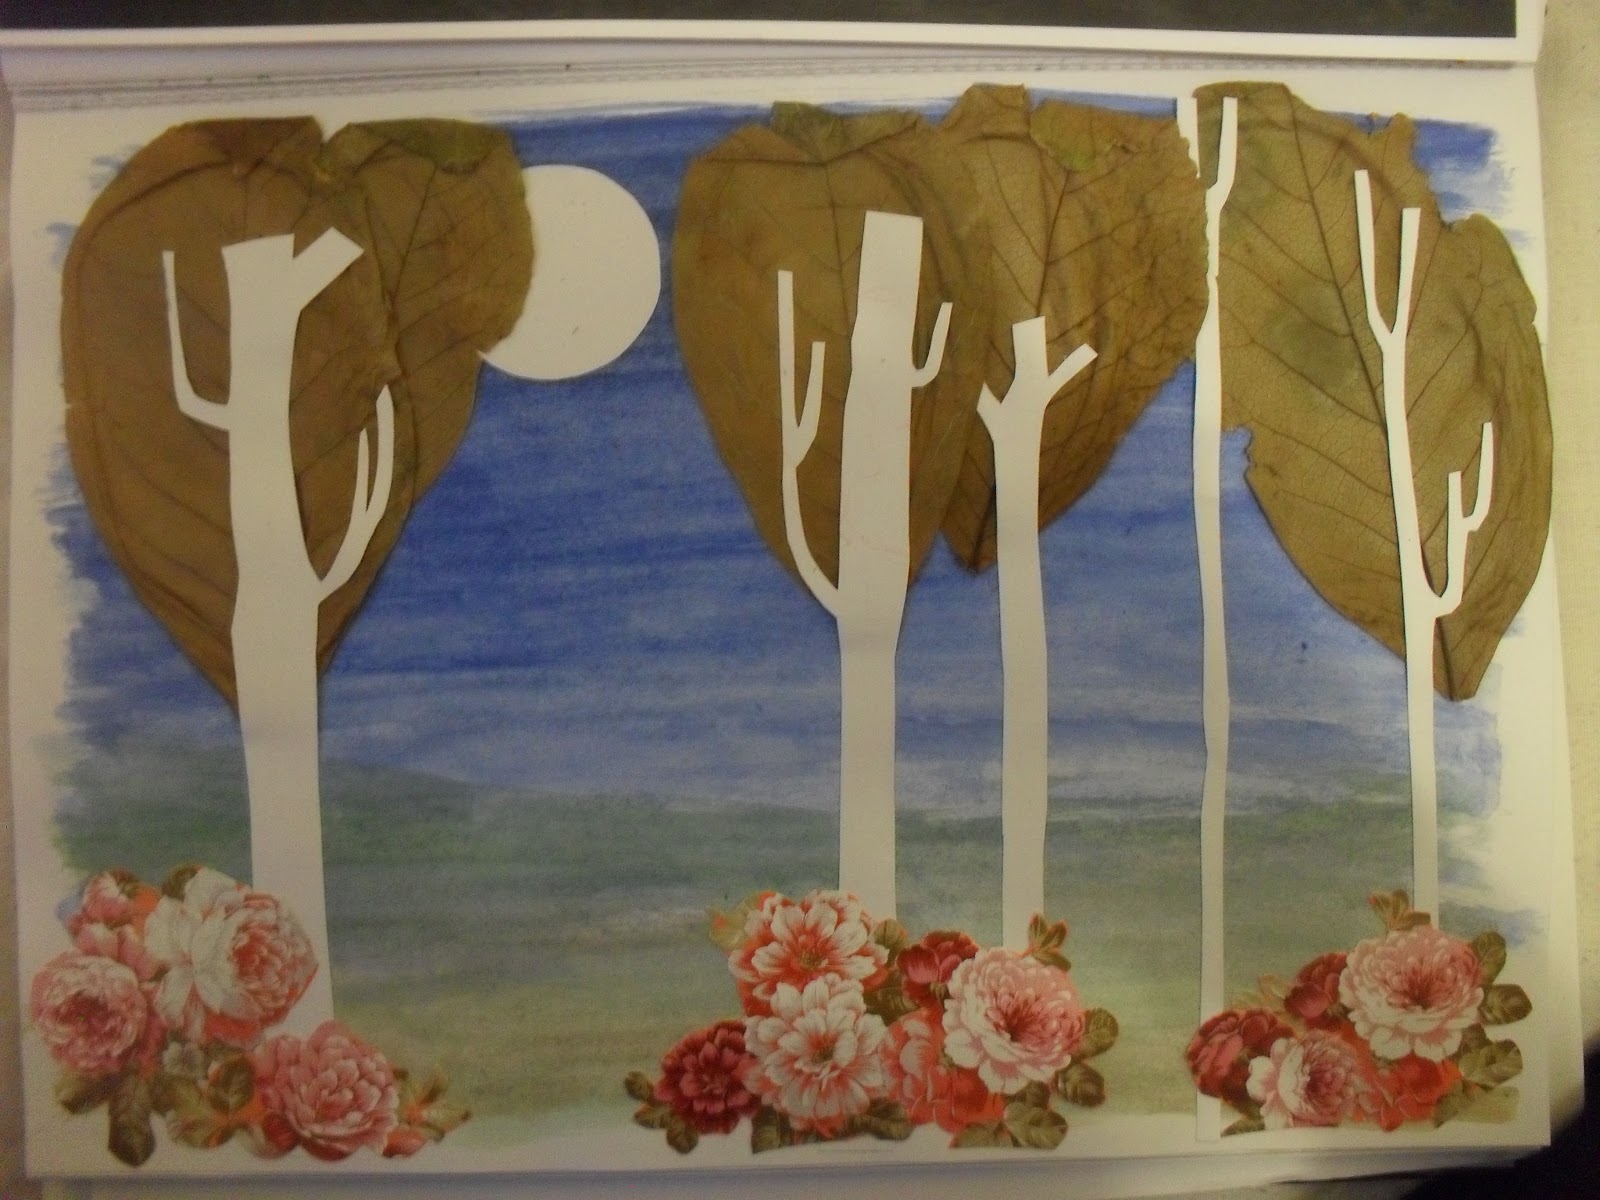
The basic shape of my forest set is a card base and a similar size canvas for the background. The trees are made from kitchen roll tubes that I've then bent into shape and then coated with newspaper and covered in tissue and watered down PVA glue. I can't tell you how much I felt like Neil Buchanan during this part of the build - amazing stuff. Once the trees were dry I stuck on some twigs to act as branches on the trees.


I then painted the trees and glued hundreds of flowers to them and painted the ground before covering it in fake dirt and grass. The canvas was then painted and holes cut into it, in the shape of stars and the moon, for the light to shine through.

Character Models:
I had to sculpt two models of the same character, and to make sure they turned out relatively similar looking I made them side by side. I started off with a wire skeleton that I could then pose and sculpt over. To sculpt them I used a mixture of Fimo air drying clay and Plasticine, for parts such as the head and hat I used tin foil as a base so they wouldn't become too heavy or even take too long to dry.


The Final Products!!


I'm sorry for the picture quality, I'm not the best at photography but I hope you liked nether the less!

Tuesday 23 October 2012

Midsummer Night Dreaming

I started out my new brief last week and since then I've just really been mulling over some ideas and designs. My new project is basically to design two different sets and a character to fit both, and then build them and light them accordingly.
When I first heard the idea my mind started buzzing to all sorts of designs and set ideas but I've settled on one that I really love and now I'm just eager to get started on the build.

For the first set I'm going to have a little boy who's obsessed with books and reading sitting in his bedroom. The other set is going to be a magical forest with the little boy now standing there in shock and awe.
As the little boy loves books I'm going to have him reading A Midsummer Nights Dream in his bedroom and then when he's in the forest it sort of ties the sets together, that and the boy will now be sprouting donkey ears and tail just like the character Bottom from the story.

Here are my initial ideas for the little boy character:


When designing the forest I tried something different, as I could not muster the energy to do a lot of drawing I made a couple of collages. I've thrown in a couple of initial drawings of the forest and bedroom for good measure as well. 


Clearly I've still got a lot to do design wise but I'm definitely liking where this is going.

Thursday 18 October 2012

Mimes and Mouths

It's been a while animation blog, it's been a while. I haven't exactly been up to much animation or build work since finishing my second year of university at the start of summer but getting back into the swing of it hasn't been as daunting as I'd thought. Lets hope the same can be said for blogging.
So I've got some drawings, paintings and such done through the summer holidays that I'll get round to posting some pictures of soon enough but lets get down to the nitty gritty first shall we? I started back at uni just a couple of weeks ago and since then I've already done and dusted my first project:

Specialist Animation!
I shan't bore you with the details so I'll give you the jist of it. Two weeks; first, complete a short Lip Synced animated sequence using a puppet and clay mouths. For this part of the brief my character had to do a sort of advertisement for the National Student Survey, trying to get students to go and take part in it blah, blah, blah............. the second part was to complete a 10 second Mime animated sequence.

I'll start this off with my Lip Sync work I think. So after getting the lovely Kevin to record a variety of audio tracks of the mini script I'd written I broke down the sound using Premiere Pro (the vain of my life) and bar charts/ dope sheets. Now, before you hear it let me just explain, Kevin ain't no voice actor, my script is pun filled and lame, and it was rather late in the night when things were recorded. Okay, you're all warned. Once the audio track was broken down I started my character build, following the ideas I'd sketched out at the start of the week.


As you can see the whole thing is made from Plasticine that I moulded into the required shapes then fixed them together using some wire. The stripes are also Plasticine that I rolled out thin then stuck to the body. Top Tip: use some talcum powder to smooth down the surface and give a smooth, shiny look (it's also pretty good on greasy hair as well but this is besides the point!). All the face is made from Plasticine too, apart from the eyes which are some beads I found. He's not finished yet though, he still needs a pot to sit in.


After searching the shops for longer than you should spend looking for a tiny pot, if you ask me, I came home to find I already had some at home. Typical. I adjusted the pot slightly so that it would have a lip at the top then stuffed it with brown Plasticine that I textured to look more like dirt. When I was happy with how it looked I shoved a pencil into it so that the two parts, body and pot that is, would fix together nice and secure. And here we have it, my final character: Carl the Cactus.


Before I forget, here is my sheet of clay mouths I made, again using Plasticine, to use whilst animating the Lip Sync.

 
Okay, and now for the final animated piece featuring the wonderful Carl:


Come on now just a little bit more to get through then you can get back to your life. I'll move swiftly onto my mime work. I don't know if it's just me but when I hear "Mime" I instantly think "Guy stuck in a box". Yeah, I had a feeling it was just me. Anyway, with the short time I had I didn't really have the time to be building a brand new maquette to be animating with. Luckily for me I've had a fully working maquette just waiting in the wings since my first year of uni, where I'd used it in a different project. It needed some repairs but nothing too time consuming which I'm so thankful for.


Due to my terrible habit of never really sticking to my meticulously thought out work plan/ schedules I had left myself with only 2 days to film my Mime animation. Animation isn't really my forte and for my final year at uni I'm really going to be sticking with build and design work but for this project I had to animate. Even with my limited skills and the short amount of time I must say I'm pretty pleased with how my animation turned out. I'm hoping the animation conveys clearly enough what the puppet is Miming? Is that the right word? Ah well here it is, enjoy:


Until next time you lovely people.