Thursday, 17 May 2012

Time to Animate

I know I should look forward to this part the most seeing as I'm an (BA) Animation student but saying that I've come to realise that building and design is what I want to do, mainly because I can't animate to save my life. Well that's slightly over dramatic but it's not far from the truth. Nether the less I tried my hardest when it came to set up, lighting and filming. I spent nearly 3 weeks solid animating my film only to find that it all needed to go and I had to start from scratch. 


Due to this setback I only had 2 weeks left to reanimate nearly everything and edit it as well. I was up to the challenge and changed my storyboard slightly to make things that much easier for me. I also had the advantage of knowing what I could improve and where.


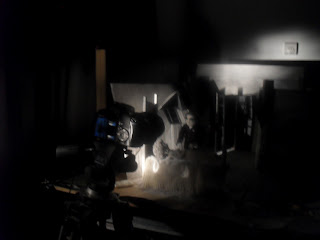
This shadow shot has been the vain of my life. What was a really nice, Nosferatu type shot when filmed came out way to exposed when exported. After trying and failing to export it several more times I tried to reanimate it. Three attempts, one computer shut down and nearly every exported film resulting in the shot turning to blank film later I gave up, choosing instead to use the crappy over exposed shot and hoping that I could edit it somehow. I couldn't by the way.

Other shots were much nicer. I had several walking shots in my film and didn't have the stamina to do a walk cycle each time so "cleverly" animated the shots in different angles or close ups so I didn't have to shoot the whole body.


A lot of time was spent setting my shots up, such as getting the camera angles and lighting right before animating even started. On most of my shots I'm pleased with how they turned out but others I'm not to fussed on and would have liked to redo.


Some of the animations I spent whole days on had to be scrapped in the end as they came out way too exposed and had to be replaced with stills, which I'm not really happy about but they seem to work.


During the editing stage of my animation I had to change everything to black and white so that it would fit my silent movie type idea. When the footage was all edited in that way I found it looked too crisp and clear for a dark 1920's stlye film so I added some Noise over the top using Video Effects to make it kind of look like old footage. It makes the film look a little better but it really isn't the way I wanted it to turn out. I didn't even have time to get rid of any of the rigs in some shots.
My final film isn't exactly how I imagined it but I think it has turned out as well as it could in the short time I had because of having to redo most of it. I'd like to post it on here but I'm not exactly pleased with it so may conveniently not get round to it any time soon.

Pizza Box Set

My budget on this production has been as tight as you can get. This is due to me having far less money then I would be comfortable with. I think though, and this is just my opinion, that even without spending shed loads on production and building I've come out with some pretty good results.
Bearing in mind that I have virtually no money to spend on building I've been lucky enough to beg, borrow and steal everything that I need for the set. My set consists of one room, the woman's bedroom, and is meant to be done in a very surrealist way; sort of like in the silent movie Cabinet of Dr. Caligari.


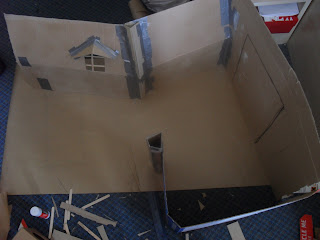
I started my set build by first setting out and building the structure of the room using cardboard boxes, and even old pizza boxes when I'd run out of cardboard. It was difficult to get the angles I wanted to start off with but with a hefty amount of tape and super glue I was able to get the look I wanted.


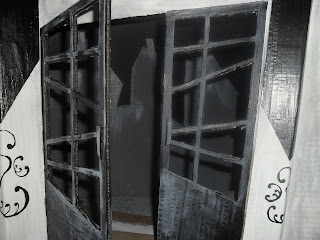
When I was happy with how the walls and such looked I went about making the doors and adding other details before painting the set in a very monotone colour scheme. I'm actually really pleased with how it came out considering all the effort and time I put into building it.


And here is the final thing in colour (or should I say black and white?). In all honesty I don't think it looks that great but with the right lighting and angles it should hopefully look quite spooky.


I only have one main prop for the bedroom, I would have liked to add more but time was not really on my side. The woman's bed was the last thing that I needed to make and I was lucky enough to find and borrow some wood for the bed's structure. When I had built the outline of the bed I padded the sides out with some foam and painted it in a way that would match the room. As soon as all that was done I just needed to cover the bed. I still had some material left from the woman's clothes so used that as the bedding by sewing and gluing it into place.


I also decided to add a clock at the start, essentially just to add more time to the piece (ahh there's a joke in there somewhere!). I drew a clock face onto some paper and decorated it accordingly then glued the image to a circular piece of wood. I then made little wooden clock hands and pinned them into place.


Getting all dolled up

Making the clothes is, I'd like to say, my favourite part of building an armature but after over 7 hours of hand sewing the tiniest outfits I feel like my eyes and fingers are on fire. And just to make it clear, generally after sewing for over 7 hours I'm not even finished with one part of the clothing. So you see the amount of time, effort and pain put into each piece, that or I'm just really crap at making clothes. 
To be awkward I decided in my design work for the guy to be wearing a suit and a cape over the top, great forward think on my part. I made his clothes first as they would be the most times consuming. I started by making patterns over the maquette's bodies using some old fabric I had lying around. I would then use these patterns/ templates to cut out the same shapes on the fabric I was going to use for the actual pieces of clothing.


Once all the patterns/ templates were made and the actual pieces cut out I then went about sewing them together or ironing them together using Hemming Web. I seriously don't advise using hemming web on tiny pieces though, you'd think it'd make things simpler but it's so fiddly and tricky and I burnt my hands so, so many times.


I made then outline of the suit using an old pair of trousers and his shirt is made from an old white shirt. I decided to make the cape as well, even though I've been thinking it may look a bit odd and too "Vampire-ish", just in case I decided to use it after all it'll be there at hand. It's made from an old Halloween cape that's kind of velvety on one side and smooth on the other, so gives a nice contrast.


The woman's clothes were a nightmare to make. Firstly, I had to have a pleated skirt and then a tight vest on top with more pleats. I decided to change the design slightly so that she had a skin tight blouse on top and a large pleated skirt on bottom. Luckily I came across an old dress that was the perfect colour, and wait for it, had a full pleated skirt at the bottom that was the right size for my maquette. The material was a little thin to go straight over the padded out armature without the padding showing through so I had to make an underskirt and vest to go underneath.


The finishing touches to the clothes meant that the maquettes we're finally finished, and hopefully ready to use. The clothes were sewn tightly over the characters bodies so if an arm or leg was to snap I would be well and truly gutted.


Hands Failure

So like before with my old woman character, I wanted to try using latex again for the hands, not so much the feet though as I wanted them rather solid, diamond type shapes. Just to side track a little for the moment, whilst talking about the feet, the woman's are made entirely of Milliput and don't move at all, except at the ankles. The man's are made of Milliput too but in two parts so that they bend in the middle, the feet are then padded in between with some foam and painted over.
Okay, back to the hands, so I was going to use latex and go through the long laborious task of making plaster casts and such again but I thought to myself "I just don't have the time". Instead I decided to try painting over the maquette's hands with my trusty pot of latex. 


I'd tested doing it on the last project and it worked fine. After quite a while of layering up these hands with thin amounts of latex I waited for them to dry. They turned out fine, well apart from the colour that is. After over 4 attempts I gave up. I wanted them to come out as white as the character's faces but that didn't happen.


They came out too skin toned, so just like with the woman's arms I decided to just wrap over the padding with masking tape and paint it white. Not the most technical I know but with little time and the hope that once edited it would look okay I powered on.

Heads

Normally when building my maquettes I like to build the heads after the armature is glued up and padded out. For my two characters heads in this project I decided to use Sculpey, I'd never used it before now so if it would work was a mystery to us all. It turns out to be quite an easy material to work with. Following expert advise I firstly scrunched up pieces of tin foil into small balls, about the size I wanted my heads to be. I then rolled out the Sculpey and covered each of the balls. I shaped and moulded it into the right shapes for my characters faces/ heads, minus their hair, and shoved them in the oven for the required time. When I took them out they looked like this:


When they'd finally cooled down I tried filing/ sanding them down a little to make the surfaces that much smoother. I either didn't do it very well or my files are crap because not really much happened. That's something to think about next time; smooth the surfaces before cooking. 
Using the same kind of technique of tin foil and thin layers I then added the hair and other details before putting them in the oven once more.


The eyebrows and eyes are removable so that I can add some kind of expression when animating. The eyes didn't turn out as round as I'd hoped so don't really spin as they should, so when it comes to moving the eyes I'm going to have to rub out and draw on the pupils each time. Tedious work to say the least.

Once the heads were made then came the best part: painting them. Areas such as the woman's face needed quite a few coats to get the right outcome but overall I'm pleased with how they turned out.


And finally after adding some Plasticine mouth’s I was left with these: