I've currently got the whole head finished, and the entire puppet to be honest, but I'm only just getting around to posting about it - naughty!
Okay, so I started off by making eye sockets - I just pushed the beads I was going to use as eyes into a slab of Fimo, that I cut to shape and then baked it. For this head I'm making it in a very different way to how I've previously made heads so there has been a lot of trial and error on the way. I ended up making 2 eye sockets as I had put the eyes too far apart. To check how the face would look I made quick sculpts of the face onto the sockets using Plasticine. I then made some paper moustache/ eyebrows/ sideburns and stuck them on because the face looked creepy without them!
I then glued my chosen eye socket onto a piece of polystyrene that I'd carved to roughly the shape of the character's skull. Shoving a long piece of K&S in it so it would fix to the neck joint and it was ready to go. I then went about sculpting the face directly onto the skull, using Fimo, which by all accounts was a completely stupid thing to do and I'll tell you for why - 1. you can't easily peel the face off, even with lots of Vaseline underneath, without it loosing its shape and 2. the Fimo I used needs to be baked, this means putting the whole thing in the oven! Looking back, I can see how silly it was to think putting polystyrene in the oven and having it come out unscathed was (then again it was the middle of the night when I did this so no judgments here please?!)
And here is the result: a shrunken, mess of a skull and a cracked face, that only just came off! You'll be pleased to know I did a better job on the actual thing though.
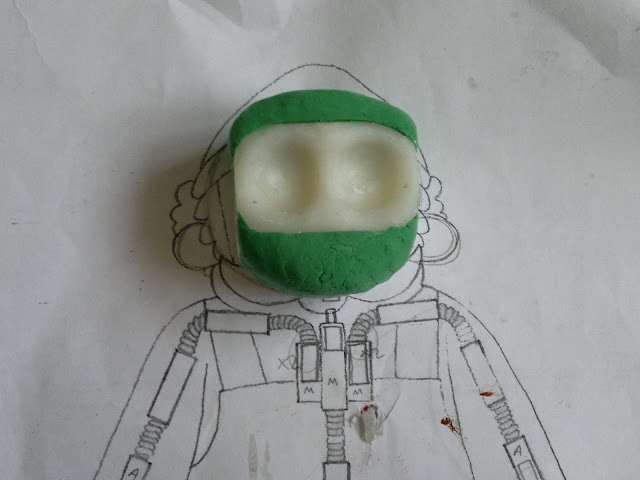
I then went about the build a little differently, especially after researching into better techniques and things. Luckily, I was able to salvage the eye sockets, so that was then glued onto a new skull shaped piece of polystyrene (don't worry, I knew what I was doing this time!). I then added Ultra Light Sculpy to the head to give a better shape and hold the eye socket on place more firmly. This Sculpy (green was the only colour I had in case you're wondering) is air drying so I didn't need to risk another oven fiasco!
When the whole head was dry I then made a "mask" on top of the front of the face - with the eyes in place - using Miliput (also air drying!!). I put a load of Vaseline on the head before I sculpted though, which is a very handy thing to do if you want the face to come off. The mask didn't need to be neat but I had to make it the right size and shape that I wanted the removable face to be. When it was dry I could then sculpt onto it quite easily and pop it in the oven no problem!
I sculpted the back of the head straight onto the skull, as it didn't need to be replaceable. To do this I used air drying Fimo clay then shoved the ears from my previous sculpt on top. I then added magnets to both the skull and "face mask" so that they would fix together more securely.
Here is the head looking rather eerie without any eyes!
I then went about painting all the parts of the head, trying to match the colour of the hands as best I could. I'm pretty pleased with how it's turned out and as I'm not doing any replaceable mouths for this character - he doesn't talk and all his expression comes from his eyes/ eyebrows/ 'tache anyway - I tried to make it as simple yet striking as I could.
And here he is! Well, minus his hair/ brows/ sideburns/ real 'tache and other key parts, but who cares aye?!
I'll be posting images of how the final head looks when I get round to doing one on his clothes, so don't you worry your cotton socks about it.
Thanks for taking a gander anyway, and hopefully soon I'll get around to posting his final look, along with the seagull!


No comments:
Post a Comment