Monday, 1 April 2013

Padding out and Latexing up!

Right, prepare yourself for what will most certainly turn out to be a pretty long - possibly tedious - post. I want to get through both the padding out of my fisherman character and my seagull, and then also the Latex work that went into them. 

So a couple of weeks ago I got the padding out stage of my puppets done but I wanted to wait until the Latex parts were done before posting (I'm not entirely sure why but lets just roll with it shall we?!). To pad out firstly I had to pad the "hard" parts of the body using hard foam, these include areas such as the chest and hips, as you don't want those parts getting all squished when you're animating as it just looks weird. How I like to think about it is adding a solid pair of pants and solid sort of cropped vest to my character. I glued these parts on using two part epoxy glue - making sure I left holes for the rigging points to poke on through.


Once the solid parts were glued on I then had to glue on the soft foam onto the areas where the joints or parts need to flex. I find cutting chunks to roughly the right shape then gluing them on before trimming to the required shape is the best way of going about padding the soft areas. For this I used a different glue, one that dries strong but still allows movement.


When the mid section was covered I then went about covering it in a sort of foam jumper. First, I made a kind of vest and then added some sleeves, but this is all meant to be the fisherman's *ahem* slightly plumper frame shall we say. It may need to get trimmed down though towards the end, depending on how thick the jumper comes out.


I then went and padded out half the legs - the wellies will add to the bottom section when made. The seagull was then padded out in the same sort of way, though the whole of his body is soft foam and his head is hard foam.


Okay, sorry to drag the post on but I'll just quickly run through the Latex areas of the characters - I've already told you how I made the hands here, and the rest is all a similar sort of process except for that they were made using just a one part mould (that may not be the technical term but ahh well) rather than a two part mould.

First things first I got the parts for Latexing sculpted out using Plasticine. By the by, this is my second attempt at the seagulls legs as I sculpted them before and then made the wrong type of mould, wasting like a week of work in the process - woe is me!!


When the sculpts were done and smoothed down with talcum powder it was then time to make the moulds. I made a box around the the sculpts using some plastic sheets and held them in place with copious amounts of tape and clay to stop any leaks when the plaster was poured on.


It was then time to pour the plaster on, making sure everything was smothered in Vaseline first of course. When everything was dry it was then time to take out the Plasticine sculpts.


When all the Plasticine was out it was time to clean the moulds before adding layer after tedious layer of precoloured Latex. It was then time to put the armatures in the mould before chucking a load more Latex in afterwards. The feet needed padding out a little first but after that they were good to go.


After a day of drying and then another day of drying after I had to redo the legs, my Latex parts were done! Huzzahh!!

This is the legs when they first came out the mould before I redid them!


And here - you lovely patient person, you! - are my puppets as they are now, with all the Latex parts and padding all on. 


Thanks for taking a look, more to come soon!

Friday, 29 March 2013

Empty Corridors

Just a quick post today as I realise I'm not posting as often as I'd like to. So lets just hope you enjoy it!

As well as my own project I have to do some collaboration work and as part of mine I was asked to build a little set for another person on my course to maybe use in their animation. It had to be a quite bleak looking place, so I designed and built a deserted, sort of creepy looking, corridor. I took inspiration from that all time classic film, The Shining, based on the book by one of my all time favourite writers, Stephen king - but this is besides the point! I wanted floral, out of date designed wallpaper; deep mahogany coloured wood; and just a general 70's inspired decor all round.

I started off by assembling the walls and thought it looked a little straight and plain, so I shaped some card and made some pillars for either side of the corridor. I then went about making the little doors (the door in the picture I made first though so that I would get the sizing right!)


After a long while browsing online for the right wallpaper I chose one I thought looked good, and then applied it to the walls using spray mount. Once I was done I looked and it and thought it just didn't look right so pulled it all off and then went about scouring the web once again! I eventually found this one which I really liked and it already looked a bit grimy too which was ace for the brief. I then added a lovely brown carpet to the mix, which I got off a dolls house website.


When I was happy with the layout I got the walls down and started to "dirty" them up using teabags and black/ grey chalks. After all that was done I fixed the whole thing together before adding extra details. 


And here is the final thing! I've added a skirting board, which I find makes all indoor sets look that much more realistic. I've also added some lights and a painting in frame (a John Constable if any of you art savvy guys were wondering) which all came from the same previously mentioned dolls house furniture store. I've got to say, dolls house furniture is the dogs when it comes to detailing stop motion sets!


Thanks for taking a look! More on my project to come soon.

Monday, 25 March 2013

Fisherman's hands

My initial plan for my characters hands was to make them out of Silicone, but after opening the container and finding the product to be a deep ox blood type red, plans changed. I decided to use Latex instead, I'd used it before on my old lady character so I knew what to expect and what needed to be done.
To start, I had to sculpt a set of hands over my armature hands, and to do this I used Plasticine - possibly my favourite thing ever! - as it's really easy to use and shape, and will come off easily later on. Once my hands were sculpted I needed to make a two part mould using plaster and clay.


Once I was happy with my sculpts I smoothed them down with talcum powder to give a better texture. I then embedded them about halfway into a slab of clay which I then covered all over the top with Vaseline (this is so the mould comes apart when dry). I added chunks of clay in two corners so that the mould fits together much cleaner when finished. 
I then made a little container for the slab to fit all snug in and glued it up nice and tight using a glue gun.


Plaster was then mixed up good and proper and gently poured over the mould. Banging the table gets rid of any unwanted air bubbles and chunks of clay stop any leakage.


When the top half of the mould was dry it was time to make the second half - hence two part mould! The box is taken off and the clay section removed, the mould is then flipped and the box put back in place. Another layer of plaster is then poured on top, and once dry there you have your two part mould all ready to use!


To make the actual hands acrylic paint is mixed with the Latex and painted on in layers before the armature is put in place and the mould smooshed back together. Then once everything is dry (I usually give it a day to dry completely) I was left with a pair of hands ready to use, once the Latex is trimmed of course.


Unfortunately, my mould broke after being used but I still needed it to make another set of spare  hands so a quick repair job using superglue was in order before I could make the second set. Luckily, everything turned out pretty well - the only problem being that the k&s discoloured the Latex in some areas - I'm very pleased with how it all came out though.

Thanks for taking a look! I'll be using Latex and moulds for other parts of my build so will update with pictures and what-not when they're done, I hope you enjoyed my little post! 

Thursday, 7 March 2013

Fisherman and Seagull Armatures

I've started building now and though I'm further behind then I would have liked I'm still trying to find the motivation to kick start my creativity - it's hiding very well! I keep getting set backs due to having the wrong materials or size materials and I really would like to be on track with my schedule.
I'll try not to be too down in the dumps about everything and give you a quick glimpse into the work I'm doing at the moment.

So, I've finally got my armatures built for both the fisherman and the seagull and a the moment I'm working on the hands and bird's legs - which will hopefully be made from Silicone when finished - but I'll be posting about that a little later once they're done and out of the way.

Both my armatures are made using k&s tubing (in various sizes, depending on where they're being stuck) and twisted wire. On the fisherman I used double twisted wire for the arms and triple twisted for the spine and legs/ feet. All exposed wire is covered in heat shrink wrap to help it last longer. For his neck I used a ball and socket joint to give it better movement and also because I'd never used one before and thought it'd be interesting to use.


When it came to the hands I used a thinner wire for the fingers - but the same double twisted wire as the arms for the wrists. Most parts of the armature are removable, as this makes fixing it much easier if it gets broken, and they all slot together via the k&s tubes. 


Each hand is glued together on top of a small, ring shaped piece of metal and the tips of the fingers are dipped in the glue to stop them being sharp and breaking through their covering. Once everything was glued and assembled together, major joints and parts (that I really don't want coming apart and also to add some weight) were covered using chunks of Milliput.

The seagull does have wings if you're wondering, they're just not in the picture! 

I hope this was useful and I'll be posting the steps I've been taking to make the hands all fleshed out as soon as possible. Thanks for taking a look!

Monday, 18 February 2013

Catch of the Day! - update

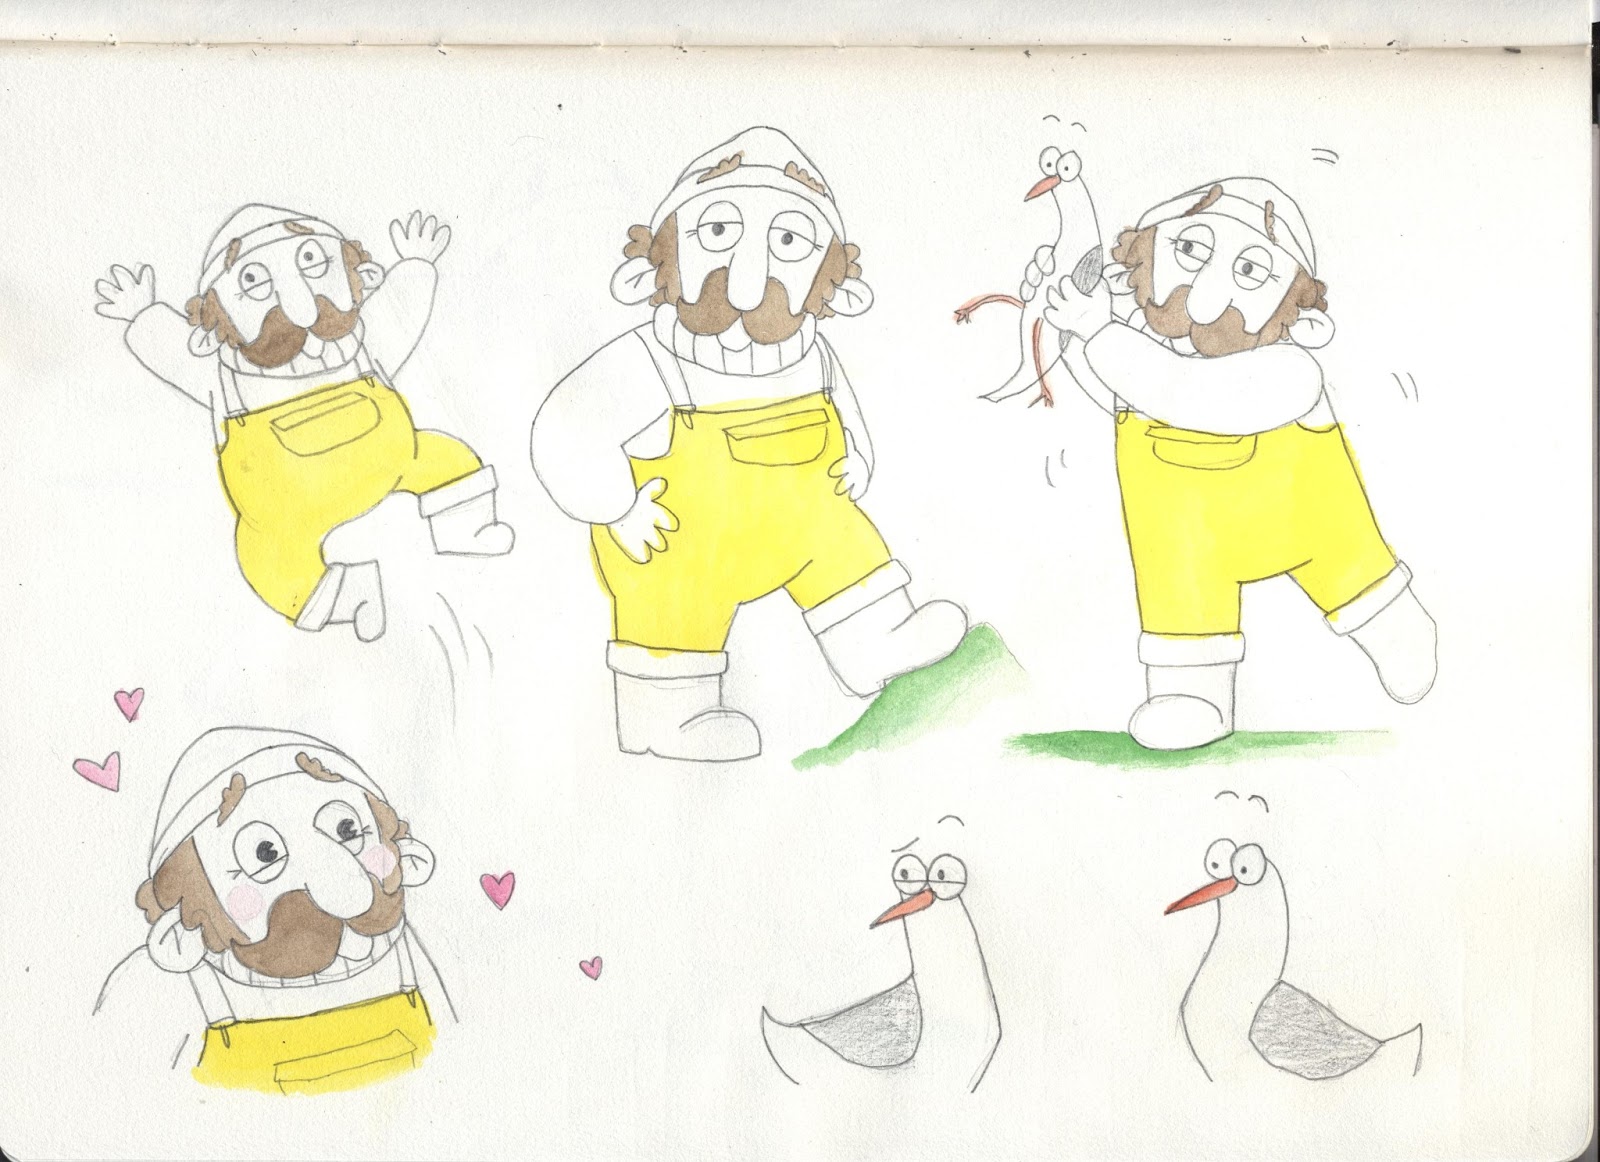
In my last post I mentioned all about my new project and Francis the Fisherman. I just wanted to update with a few more drawings, just some action and expression sheets and some prop designs though, not too much. 

These are my action and expression sheets, all my characters emotions are displayed through his 'tache and eyes. I think I had a little too much fun with some of the drawings and he seems to look like he's a teenage girl.................... they're probably my favourite pictures as well!


Here I have drawn out and painted the props and all different parts of my set that I need to build as well as the character maquette. I'm really pleased with how everything fits well together and how all the designs and colours look.


Thanks for taking a look!

Saturday, 16 February 2013

Catch of the Day!

I'm onto my last ever project on my university course and I've got to say I'm pretty pleased with the brief. It's a doozy! I know I'm a little late in the posting but I wanted to get all the final designs sorted before I put it on my blog.
The brief is the create a character, set, props, etc. for a cereal commercial (or food or drink commercial), design and build it. As I'm only a model maker now I've got to give it the beans when it comes to the build. Anyway, I chose to do a breakfast cereal for fishermen and it's called - wait for it - Catch of the Day! I'm really loving my designs, even though they aren't drawn out that great, and the story line is coming along well. Not to toot my own horn but I think this is going to be my best stuff yet. 

I'll show you some of the designs so far, though there will definitely be more to come sooner or later so watch this space!

This is my Fisherman character, Francis. I'm very excited about knitting his jumper!


This is my breakfast cereal design, there isn't too much detail as it won't be that large when built.

And here is my final set design, it took some time but I finally decided on this as I thought it suited Francis well.


Thanks for taking a look! I'll be posting more pictures and the steps I take to build everything as soon as I can.

Wednesday, 6 February 2013

Artists to the Rescue!

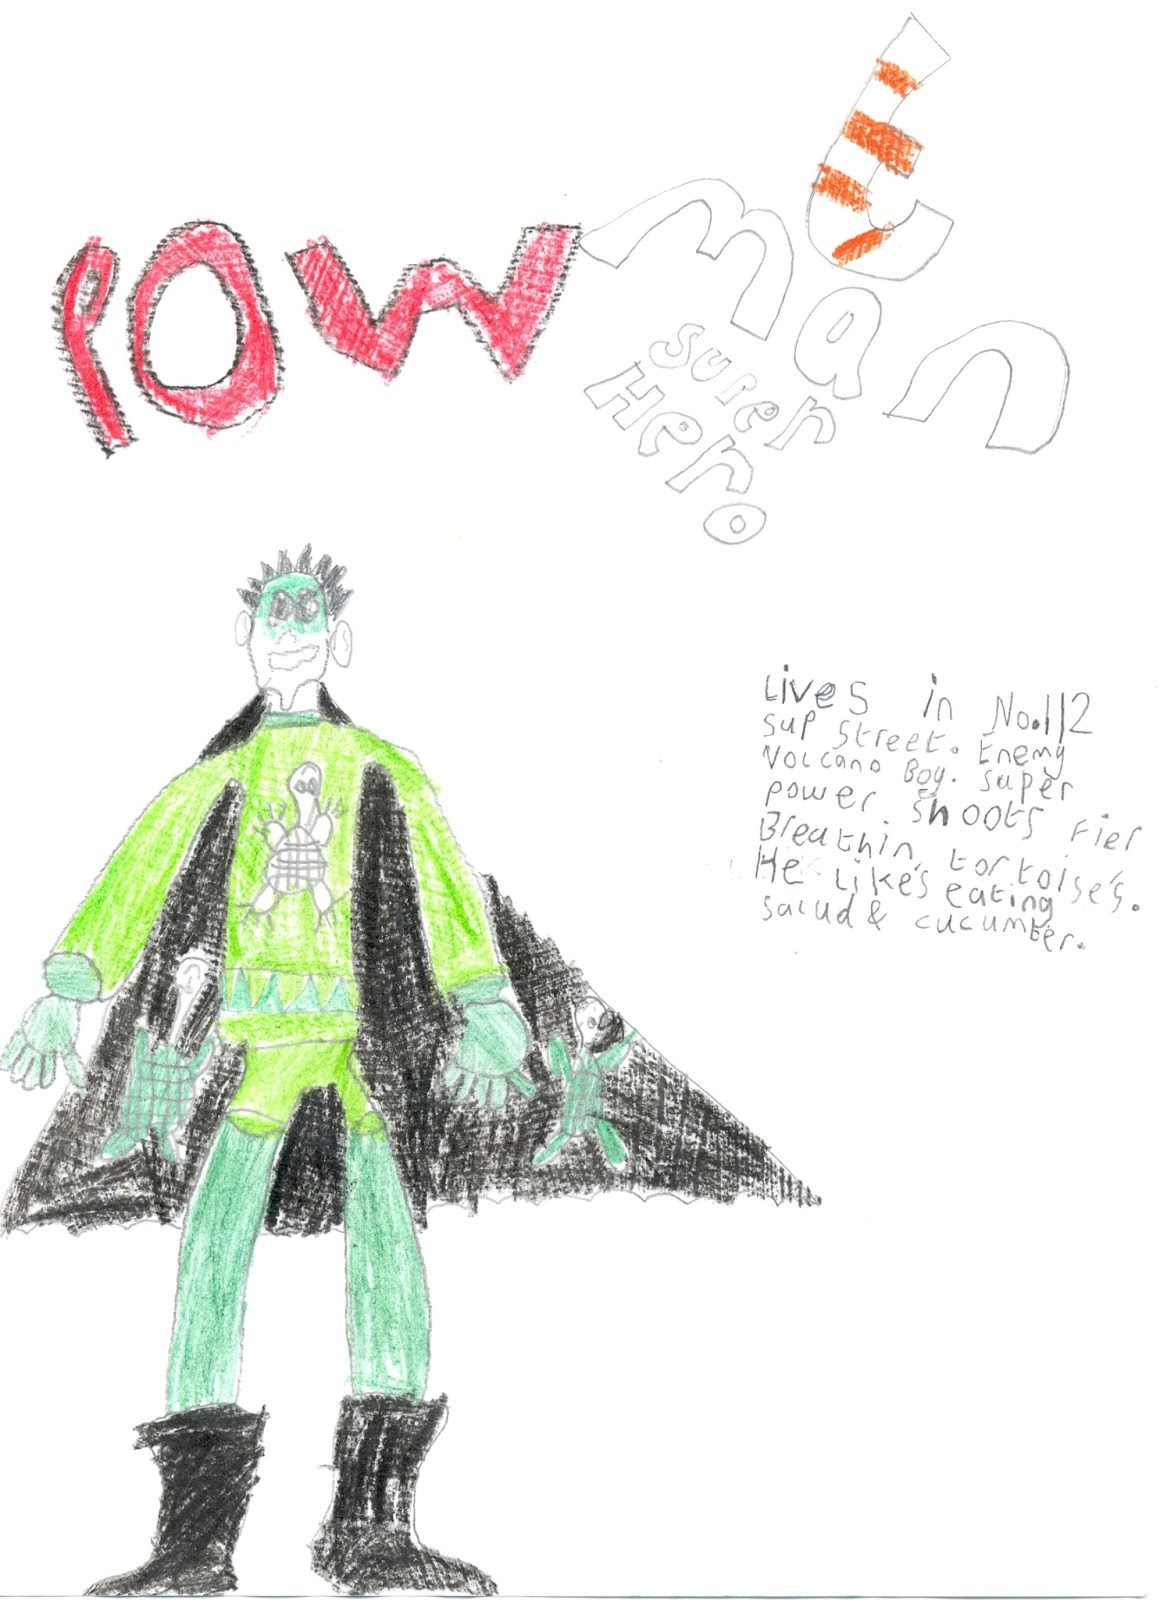
Is it a bird? Is it a plane? No! It's my re-imagining of school children's drawings (yes I did just write that). Moving swiftly on. I'm roughly in the middle/ toward the end of my design work for my final ever uni piece of work, pictures soon to come, but in the meantime I was given a little brief to have a go at alongside my major brief, that would count towards my collaboration work. 
The children of St Gwladys primary school in Bargoed were set a drawing competition to design a super hero; the winning designs were going to be transformed into final colour character concepts for animation by the students on my course. Exciting stuff to say the least. We picked two characters at random then had roughly a week to draw them out. Now, I'm not the best when it comes to using computer software, mainly because with my work I have hardly any need for it, so I decided to go down the route of drawing them out by hand and painting them using watercolours (my paint of choice at the moment). 

So here is the first one of the children's superhero drawings:


and this is my version:


Here is the second of the children's drawings:


and this is my version:


They're not the best and compared to some of the designs I've seen from other people doing the project, they don't look as professional (sob sob!). However, with the tiny amount of time I spent on them what with all my other work, and my lack of Photoshop use, I'm pretty pleased with them. 

With more time I'm sure they could look much nicer but to say I didn't have fun whilst doing it wouldn't be true. It was so much fun, so much so that my boyfriend even had a go at drawing them (though I don't think he'd be pleased if I put his drawing up). I highly recommend having a go!